Deadlines for 3 Mini Tutorials
All three mini tutorials must be on your website for full credit by:
First Group: Feb. 10
Second Group: April 14
First Group: Feb. 10
Second Group: April 14
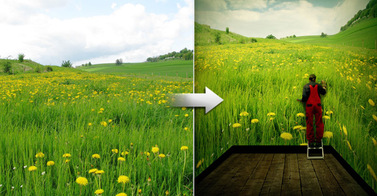
Mini Tutorial 1: Recreating a Surreal Room
|
Students will learn: Move Tool, Marquee Tool, opacity, layers, Transform/Scale/Skew. Tips for Learning: 1. Start with this website: designinstruct.com/digital-art/photo-manipulation/surreal-3d-outdoor-room-scene-photoshop/ for the images of the room. Follow along with O'Ryan on class demo. Short cuts you will need: Ctrl/command T = Transform Size M = Marquee selection tool v= Move Tool B = paintbrush 2. For extra credit, include the person painting the room. 3. Save the image once as a psd file, and again as a .jpg. The JPG will go on your website. |
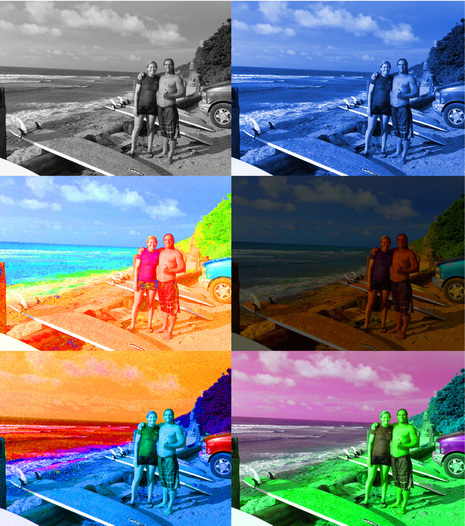
Mini Tutorial 2: Changing the Color and Repeating Shapes
|
The purpose of this assignment is to learn how to change the color of an image using a shortcut, how to change the size, and how to repeat a layer.
Two shortcuts needed for this tutorial are:
Deadline: |
|
Here are the steps and there is a video tutorial below:
Step one: Find an image of yourself or perhaps someone you love.
Step two: take this image and save into your folder.
Step three: Open in Photoshop.
Step four: Open a new document (Ctrl/Command + N) vertical orientation. Width: 8 in. Height: 10. Resolution 300.
Step five: Drag image of yourself or someone you love, using the move tool (V) onto the new document. Place in the top left corner.
Step six: Ctrl/Command + J once.
Step seven: Grab with move tool (v) the new image. Place to the right of the original. If your images are larger or smaller than the paper, you need to do the following: Select both layers in the layer box using the ctrl key. Then Ctrl/Command + T to change the size of both layers at once. Grab the bottom right corner, hold down shift and either expand or shrink both layers so that they are side by side, traveling across the top of the paper.
Step 8: Keeping both layers selected in the layer box, Crtl/Command + J. Drag below.
Step 9: Repeat previous step.
Step 10: Repeat until you have six images, two x four. If you have access white on your paper, push the letter C on the keyboard, and crop out the selection you do not want. Press enter. Then push the letter V to activate the move tool.
Step 11: Select first image layer. Ctrl/Command + U. Notice a menu appears called Hue/Saturation.
Step 12: Drag the hue bar across until you see colors changing. Click on one you like. Say Ok.
Step 13: Select a new layer. Repeat step 11. But this time change the saturation. Say OK when you like something.
Step 14: Select a new layer. Repeat Step 11. This time change the lightness/darkness level. Say OK when you like something.
Step 15: when you are happy, do this to all six layers.
Step 16: Save image once as a .psd and once as a .jpg. Place on website.
Video Tutorial Below:
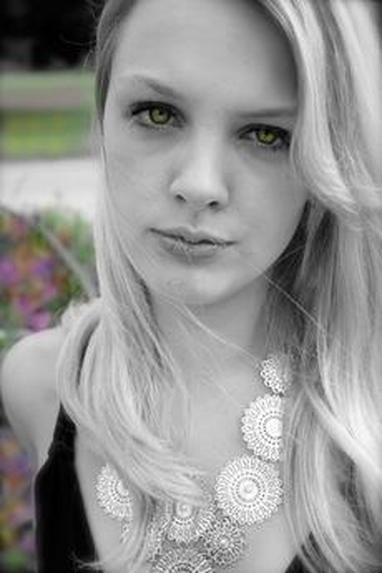
Mini Tutorial 3: PhotoTint Project
|
What are you doing:
For this project, students will learn how to use the paintbrush to add color to an image that was changed to black and white. Why are you doing this: retouching old photos for your family will instantly make you the favorite relative...just kidding. You are learning this to understand the use of contrast & color to change the mood of a pice. Requirements: Use an image of someone you love. Video tutorial: |
